图老师电脑网络栏目是一个分享最好最实用的教程的社区,我们拥有最用心的各种教程,今天就给大家分享Illustrator使用SSR法绘制高级等角图的教程,热爱设计的朋友们快点看过来吧!
【 tulaoshi.com - Illustrator 】
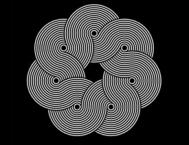
你要绘制的成品图

在之前的教程中,我讲述了怎么样制作一个等角网格,怎么样在网格上面绘制简单的分片的形状(对象每个面的形状)。在本教程中,我想说一说不借用等角网格绘制等角形状的另一个方法。如果你要绘制的是结构复杂或者是多弧线的对象时,那么这个方法就会更加有效。
当你要绘制一个结构复杂的等角图时,最好的方法就是简化你的对象(把结构复杂的对象转化成一个个简单的基本形状),这会使设计更接近于你想要达到的目标。当然,使用之前教程提及的等角网格的方法也是可以绘制很复杂的对象的,但是想要更容易地绘制多弧线或者结构复杂的等角对象就要使用另一个方法,我称这个方法叫比例缩放Scale、倾斜Shear、旋转rotate或者叫SSR法。
SSR法的基本思想是:在不使用网格的前提下,通过使用Adobe Illustrator里的工具使某一对象处于等角的平面上。这个方法特别是对多弧线或者结构复杂的对象来说,更加实用。
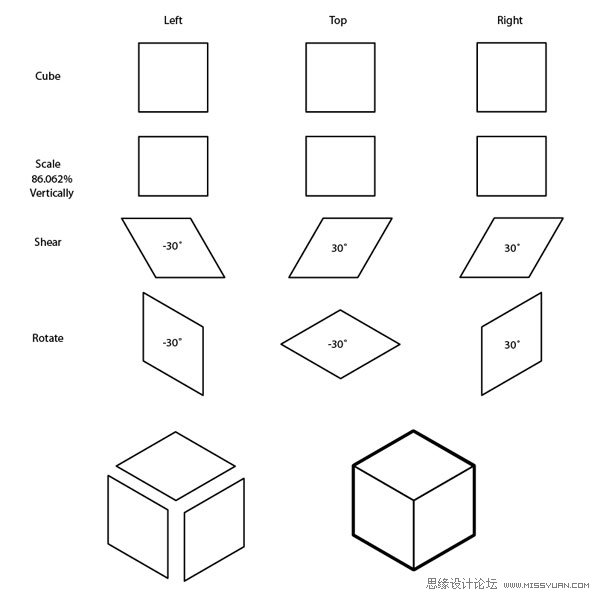
下面我会先简要地说一下等角立方体的绘制,接下来的一些步骤使用的都是SSR法。
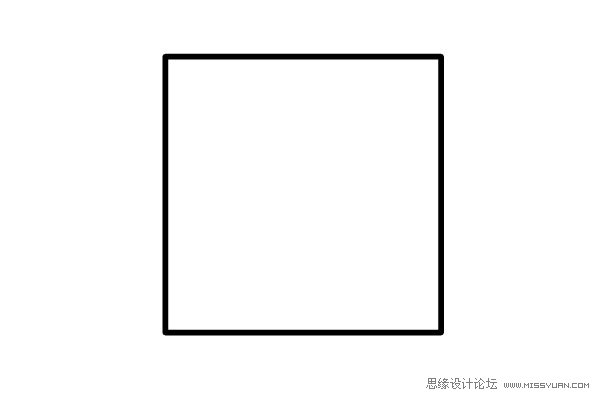
Step 1
Create a 4 inch square with your Rectangle tool.
使用矩形工具绘制一个4in的正方形。
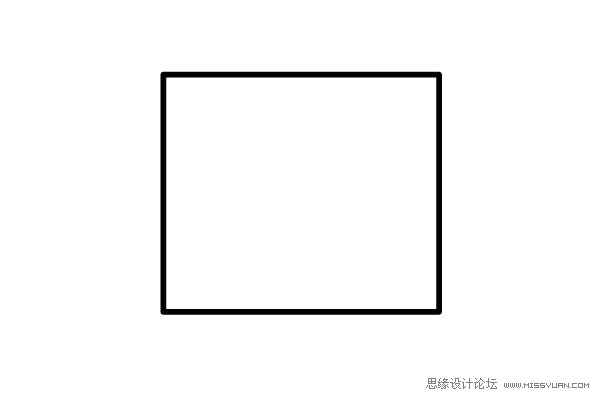
Step 2
(本文来源于图老师网站,更多请访问https://www.tulaoshi.com/illustrator/)With the square selected double-click on your Scale tool. Scale the square 86.062% vertically.
选中正方形,在比例缩放工具上双击。缩小正方形,不等比:垂直86.062%。
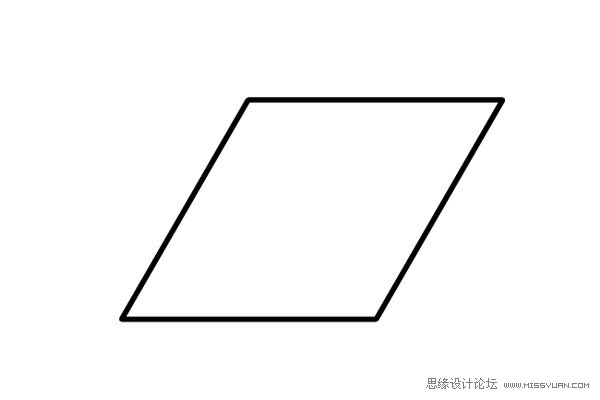
Step 3
With your object selected double-click on the Shear tool and shear the object 30 degrees.
选中对象,在倾斜工具上双击,对象倾斜30度。
Step 4
With the object selected double-click on the Rotate tool and rotate it -30 degrees. You have now created the top of your cube.
选中对象,在旋转工具上双击,对象旋转:-30度,现在绘制完成立方体的上方(顶部)。
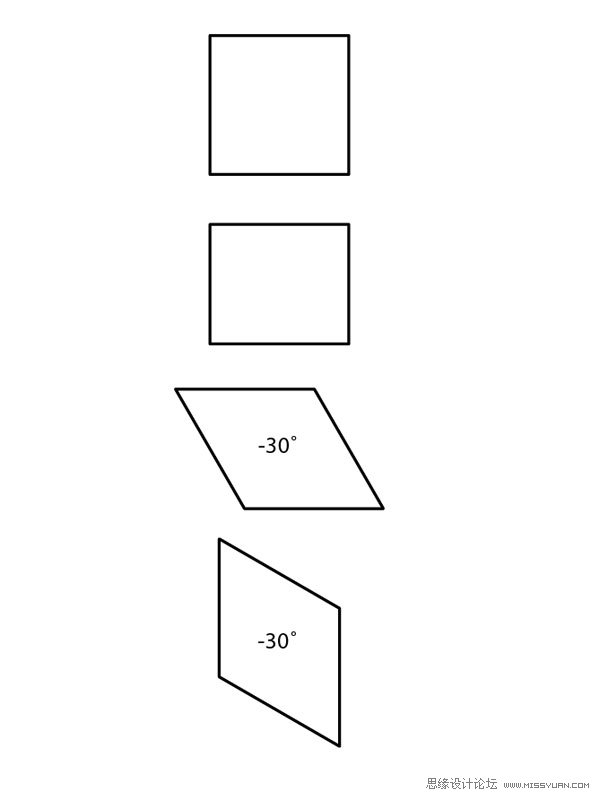
Step 5
To create the left side of the cube, begin with a 4 inch square. Scale vertically 86.062%, Shear -30 degress, and Rotate -30 degrees.
绘制立方体的左侧面。首先绘制一个4in的正方形。比例缩放,不等比:垂直86.062%。倾斜:-30度,旋转:-30度。
Step 6
Use the selection tool (black arrow) to line up the front corner with the top of the cube.
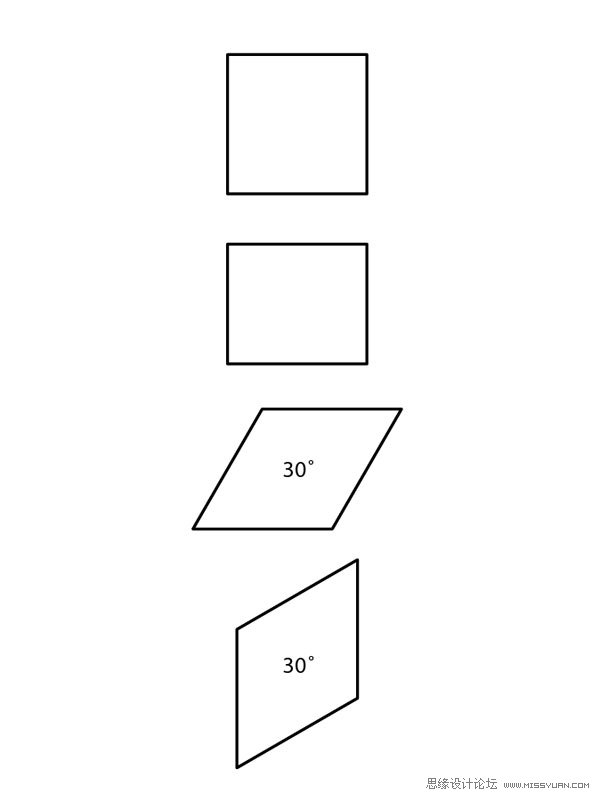
To create the right side of the cube, begin with a 4 inch square. Scale vertically 86.062%, Shear 30 degrees, and Rotate 30 degrees.
使用选择工具(黑箭头),使前面(左侧面)的控制角点(左侧面最顶部的2个锚点)和立方体上方(顶部)的控制角点(对应锚点)对齐。
绘制立方体的右侧面。首先绘制一个4in的正方形。比例缩放,不等比:垂直86.062%。倾斜:30度,旋转:30度。
Step 7
Next, move the pieces into place with your Selection tool. You have now created an isometric cube without using a grid.
下一步,使用选择工具,把每一面移到相应的位置上。现在你在不使用网格的前提下,已经完成了等角立方体的绘制。
The power of this method becomes apparent when you try to create an object that would be very difficult to construct on a grid. This method only works if you have a set of orthographics to work with.
当你很难在网格上构建对象的时候,这个方法就会变得很实用了。如果你有很多基本图形需要做进一步处理的话,那么这个方法就很容易实现。
Making a Stratocaster Using the SSR Method
For this example I’m going to build the body of a Guitar. To make this complex shape in isometric using only a grid would be a challenge. The complex curves and compound shapes would be very difficult to recreate accurately.
使用SSR法制作一把Stratocaster(吉他的型号)
比如:我要绘制一把吉他(吉他的琴身)。如果只是使用网格来绘制结构复杂形状的等角图的话,将会是非常困难的一件事情。想要精确地重绘复杂曲线和复合形状都是非常困难的。
Step 1
There are many ways to make a set of orthographics depending on your object. You can look online for a set of blue prints, you could trace a photo, and if you own the object you could take it
apart and measure it. Use whatever method works best for your project.
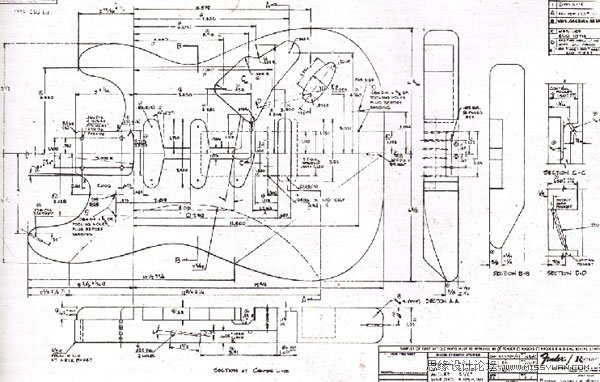
One quick Google search and I’ve found the perfect set of factory blueprints of the 62 vintage re-issue Fender Stratocaster. These blueprints are much more detailed then I need, but you can be as precise as you’d like for your own projects. Having too much information about your object is never a bad thing.
1. 绘制对象的一些基本图形有很多的方法。你可以是参照蓝图的大致的轮廓,你也可以是手动描摹照片,或者如果你有实物的话,你也可以是把它的东西逐一地测量,然后绘制。选择你觉得最好的方法绘制。
我用Google的快速搜索,找到了一张62 vintage re-issue Fender Stratocaster.(电吉他的型号)的生产图纸,这张图纸有我所需要的细节的东西。当然你也可以根据你自己设计的要求,搜索一张更加高清的图纸。图纸的细节内容表现地越是丰富越是祥尽,对你来说不会是一件坏事。
Step 2
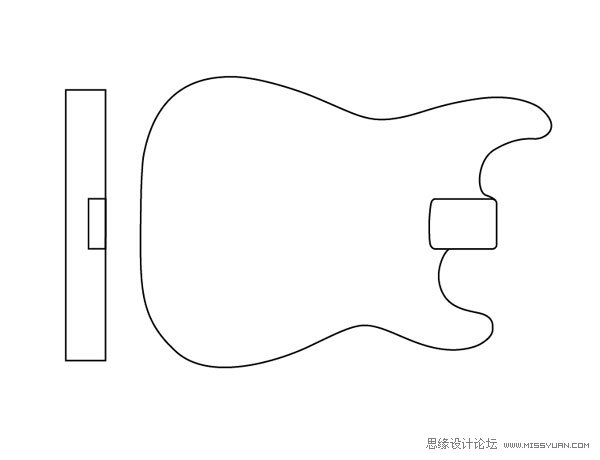
(本文来源于图老师网站,更多请访问https://www.tulaoshi.com/illustrator/)Trace your blueprints. I’m going to trace just the information I need to complete my isometric, and I’m going to simplify parts of the design.
2. 描摹蓝图。我描摹的只是我需要的那部分内容,以完成之后的等角图的绘制。并且我简化了设计。
Step 3
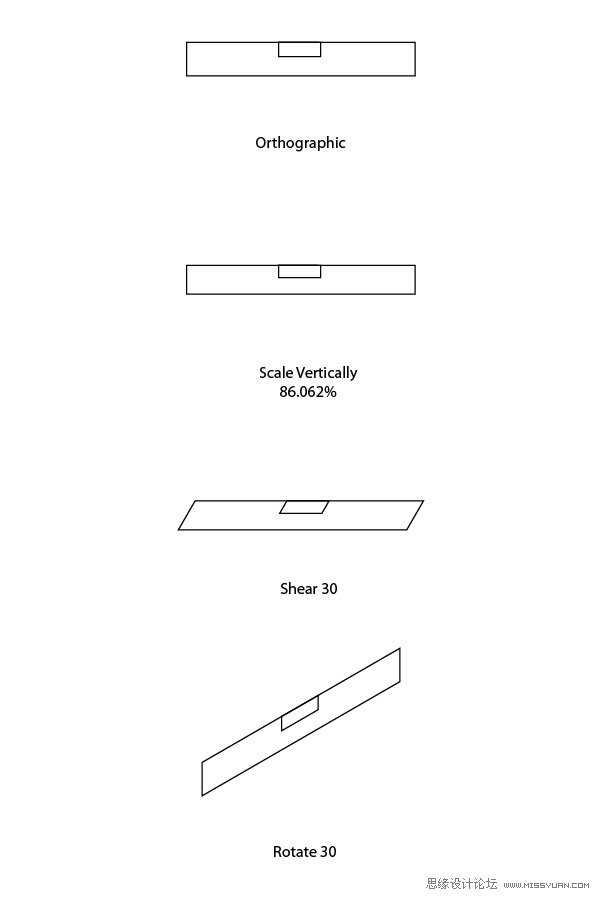
Once you’ve chosen your orientation you can scale, shear, rotate (SSR), your bottom plane.
3. 当你要给对象定位时,你可以使用比例缩放,倾斜,旋转(SSR)。这是吉他底层的面。
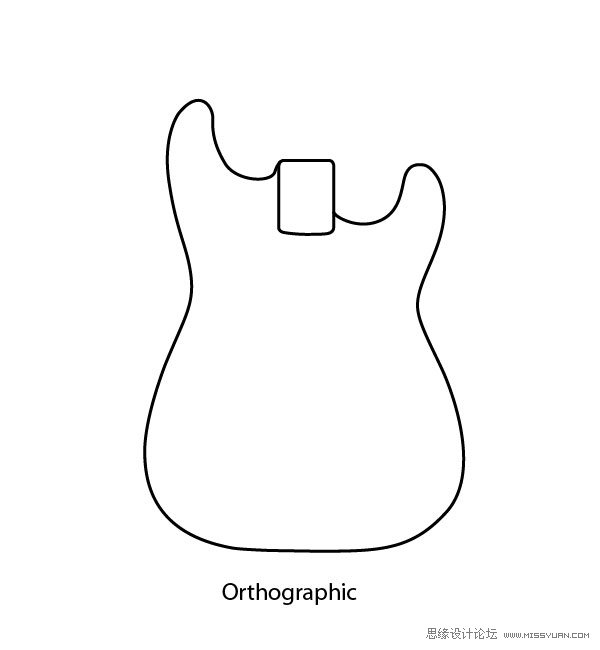
图示分别为:orthography基本图形
Scale vertically:比例缩放,不等比:垂直:86.062%

Shear 30:倾斜30度
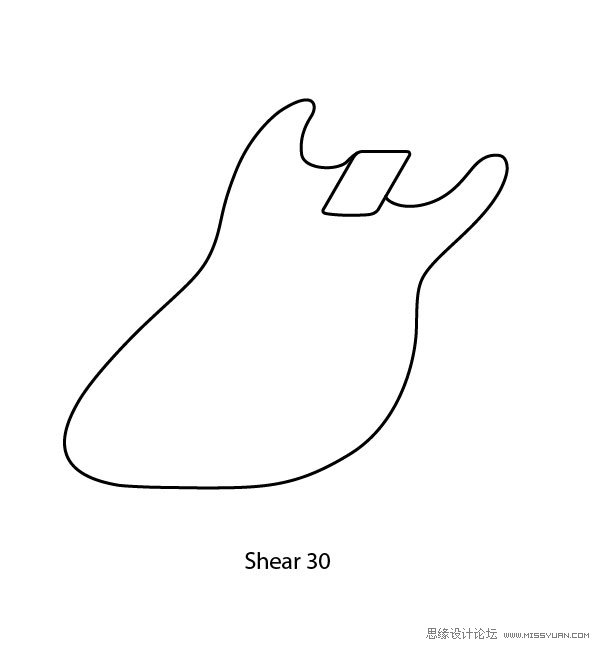
Rotate-30:旋转-30度
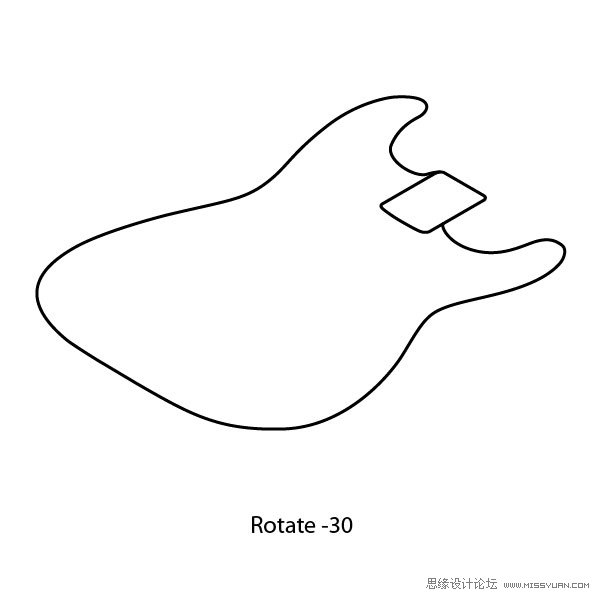
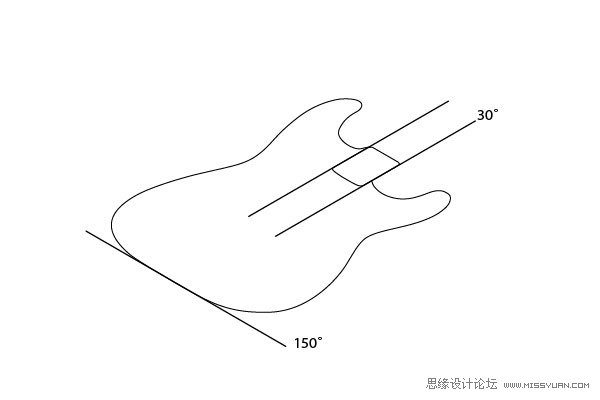
You can check your work by comparing any edges that in the orthographic are 90 degrees or 180 degrees. These edges will now fall onto an isometric grid; they will either be on the 30 degree or 150 degree angle.
你可以以90度或者180度的基本图形为基准,来查看每一条边的角度(图示)。这些边刚刚好落在等角网格上,他们或者是落在30度角上,或者是落在150度角上。
译者提示:还记得第一篇教程吗?等角网格是由30度角的直线和150度角的直线纵横交叉而成。
Step 4
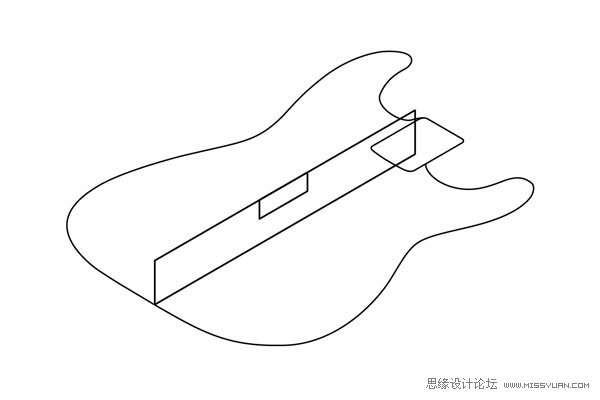
Now that you’ve created your base you have something to work off of. By taking the side view of the orthographic and scale, shear, rotate (SSR) it onto the Isometric plane you can figure out the thickness of the guitar body.
4. 现在你完成了底部的绘制。再来绘制吉他的侧面视图。比例缩放,倾斜,旋转(SSR)。并且在等角平面上,你可以利用这个侧面视图计算出吉他琴身的厚度。
图示分别为:orthography基本图形
Scale vertically:比例缩放,不等比:垂直:86.062%
Shear 30:倾斜30度
Rotate 30:旋转30度
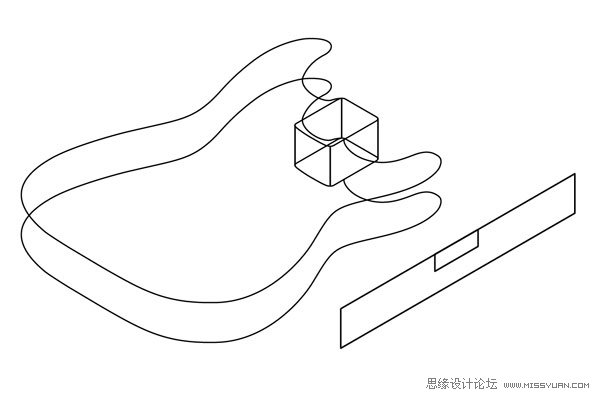
Step 5
Line up the bottom edge of the guitar body with the corner of the orthographic side view.
5. 将吉他琴身底下(底层的面)的边和吉他侧面视图上的控制角点(锚点)对齐。
Step 6
Next you want to copy the outline of the guitar body and move it up to the top edge of the side view. To do this use your Selection tool and click and drag on the edge of the outline, before letting go, engage the Option button to make a copy. You should also use the Shift key to constrain the movement. Holding the Shift key while moving the shape will ensure it stays lined up with the original.
6. 现在你要复制一个吉他琴身的外形轮廓,把它移到吉他侧面视图上的顶部的边上(图示)。要实现这一步,你可以使用选择工具,然后点选图示的下面那个点(吉他琴身与侧面视图相交的下面那个点),然后把它平移到图示的上面那个点(吉他琴身与侧面视图相交的上面那个点)。平移之前,先选择相应的选项按钮,制作吉他琴身的副本。你也可以使用Shift键来约束对象的移动。当移动形状时,按住Shift键,确保对象是向上平移的。
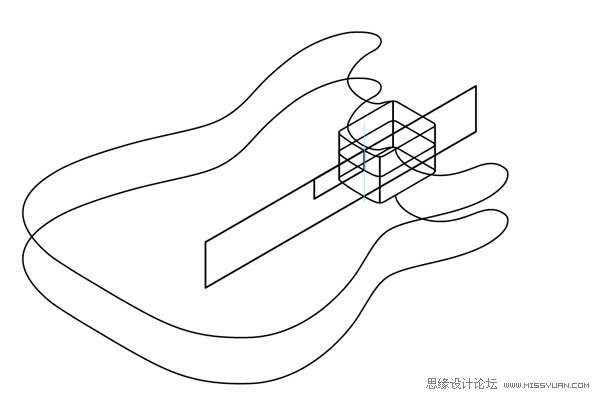
Step 7
Now you have blocked out the top and bottom planes of the guitar body. The next step is to cut out the spot where the neck is inset. Start by connecting the top and bottom planes of the neck opening so it’s easier to see the area that you are working on.
7. 现在你大致画好了吉他琴身的顶部和底部的面。下一步是,把插入的琴颈(侧面视图)从吉他琴身里抽出,然后连接琴颈开口的地方。这样有助于你看清楚接下来要绘制的内容。
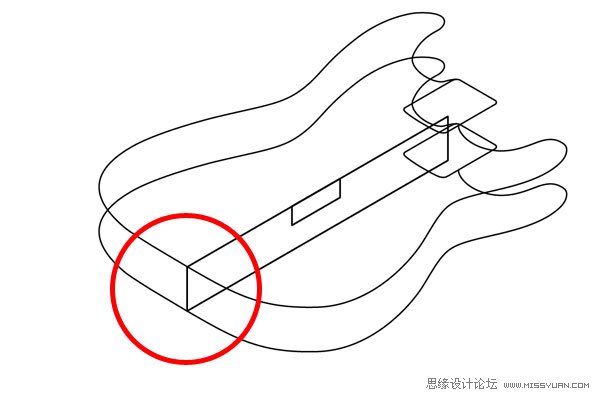
Step 8
Using the side view you can mark off how deep the neck cutaway goes into the body. You now have three planes, the top, bottom and depth of the cutaway.
8. 你可以使用侧面的视图来测算嵌到吉他里的琴颈剖面的深度。这时,你就有了3个面:顶部、底部和剖面的深度。

Step 9
The next step is to use the Scissors tool to cut away all the excess lines you don’t need anymore. This is often the hardest part for an artist new to technical drawing. All the overlapping lines and shapes can be overwhelming. But if you take your time and start with the clear big shapes it will help to clean up the more complex areas.
9. 下一步是使用剪刀工具剪去多余的线条。这对于绘画技术不熟练的人来说,是比较难操作的一步。可能有很多需要隐藏的重叠线条和形状(这些线条和形状必须剪掉)。但如果你有时间的话,最好还是再画一个大一点、清晰一点的形状,这将更有助于你清理不需要的线条。
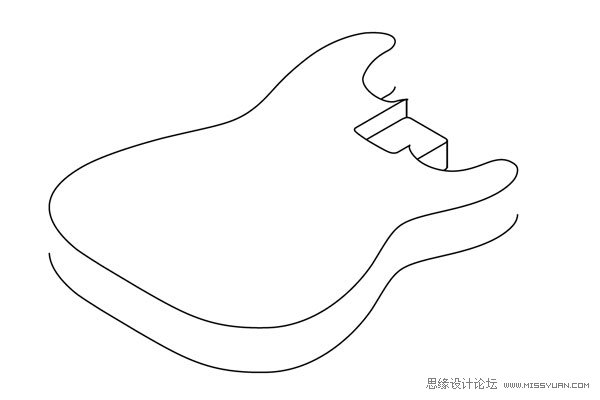
Step 10
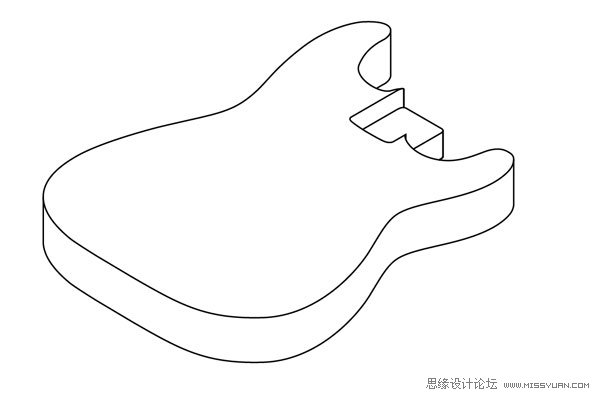
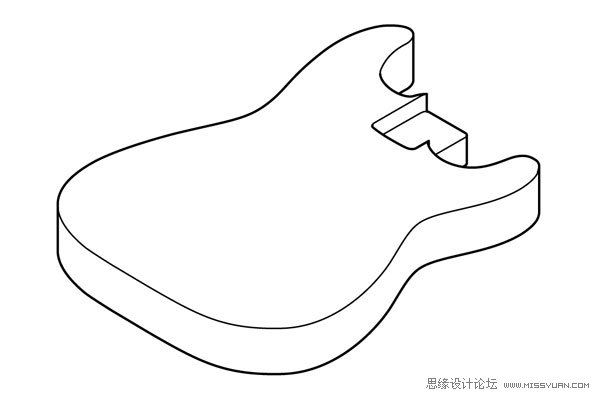
(本文来源于图老师网站,更多请访问https://www.tulaoshi.com/illustrator/)After clearing away all the line you don’t need anymore, connect your corners and finish the shapes.
10、 剪掉不需要的线条之后,连接控制角点(锚点),以完成最后的吉他琴身。
Add some line quality and you’re finished.
加深一些线条,完成成品图。
Conclusion
You have now finished the body of the guitar. You could continue on and complete the entire guitar, the exact same steps would apply for each part. This is an example of an exploded isometric of a Stratocaster I did a few years ago with this method.
尾声
现在你完成了吉他的琴身。你可以继续绘制和完善整个吉他造型,接下来的每一部分使用的都是之前同等的方法。下图是Stratocaste(吉他的型号)等角图的一个实例,这是我几年前绘制的,使用的也是这个方法。
来源:https://www.tulaoshi.com/n/20160216/1572793.html
看过《Illustrator使用SSR法绘制高级等角图》的人还看了以下文章 更多>>